SO YOU WOULD LIKE TO BUILD A MODEL TRAIN LAYOUT….?
Most of us who belong to the male gender category, if we are
honest with ourselves, will have to confess that we have always wanted to
construct a model train layout. There is
just something about the allure of the rails and the temptation to build and construct
something in which we can take pride that captivates us men. So many of us seize the opportunity provided
by having a little boy to construct one for him. But, everyone knows, it is really for
us.
I admit that I fell in love with railroading when at age
eight my father took me on a train ride from Springfield, Missouri (my home
town) to Kansas City, MO. The love
affair has continued to this day and shows no sign of diminishing. My first “layout” was setting up my O gauge
Lionel set that my father bought me for my tenth birthday first in my living
room, then at my grandparents’ upstairs den, and then, combining mine with my
friend Roy’s, in my basement. After my
wife and I married and we had our own house, I began with HO, and I had some
kind of a layout in every house in which we have lived through the years. The current one is in our condo in an
upstairs room that I had constructed from an unfinished attic storage space.
So why build one? No one can answer the question except that
it becomes an itch that has to be scratched.
But my life has been devoted to critical analysis of propositions, so
let me suggest a few:
1. *The joy of planning. We all enjoy thinking through, drawing up
plans, putting scenarios together in our minds, and conceptualizing something
that WE can accomplish.
2. *The joy of building. Why do we love building things? It is in our DNA. It is so exciting to see something beautiful
take shape before our eyes, something we have done.
3. *The joy of showing it off. No comment needed.
4. *The joy of operation. Model trains work; they run; they move at our
command. Maybe it gives us an unholy
sense of power, but it is great fun.
5. *The joy of imagination. We can see our little world and allow it to
become real in our minds.
6. *The joy of scheduling. Because trains run, we can simulate real
train operations, whether freight or passenger, by establishing schedules and
running the trains accordingly.
Then what are some key decisions that need to be made before
construction?
1. *Survey your space. Model train layouts can be adapted to any
space, small or large. It just requires
some imagination and creativity, and we all pride ourselves on having
both. Some people build on table tops or
shelves. Others have a space large
enough for an oval or a dog-bone shape.
Basements or garages provide the most space in a house, mine is in an
attic, and I have had them in bedrooms.
Just see what the space allows, and begin your plans.
2. * Decide on your gauge. O is too big unless you have an enormous
space such as an empty warehouse or store; most houses can’t accommodate a
viable O layout. G gauge is for outdoor
running and is fine if you have the yard space.
(G = Garden). Z is very tiny and
best for table-top operation. Most model
train enthusiasts choose N or HO. You
can model much more space with N such as running from city to city with plenty
of country space in between. HO is twice
the size of N (and half the size of O) and is more realistic and easier to work
with, but you will be twice as restricted in space. I have used HO since 1960 and find it exactly
what I want. My eight towns may be a bit
near to each other, but I compensate by making several loops before the next
station.
3. * Decide if you want a prototypical or mixed or
hybrid layout. With the hybrid layout
you just pick out trains you like with no particular reference to the line or
location, and you run them and have fun.
But many prefer to model a particular railroad that runs or ran in a
particular location. After I began
taking tours to Europe, I decided that the Swiss really made the railroad the
central form of transportation in their country, and I just found them
beautiful. Thus for many years, after
starting with an eclectic, mixed European layout, I narrowed my focus to Swiss
railroading. Thus I have selected to
model several cities in Switzerland. I
had a friend who modeled the old Clinchfield Railroad in East Tennessee, and
another who created an environment based on what he observed as he traveled for
his job, largely patterned on East Tennessee and involving CSX.
4. *Along with deciding about prototype, if you
are doing anything other than the mixed or hybrid form of model railroading,
you need to decide on the era. Most
modelers like the 1950’s era because they can include both steam and
diesel. That was the time when steam was
being phased out but was still around, and diesels were being phased in. Some people prefer Civil War era so they can
model the really old trains and many like a Western theme so they can do
mountains and mining trains. Others will
prefer a modern theme. I have failed to
keep up with mine because most of my Swiss equipment reflects the 1980’s
period, and it is still running well.
But if need be I can change and bring it up to the present.
5. *You need to decide on the basic pattern of
operation. You can have a loop or
dog-bone configuration in which trains will run around your layout. In this way you can run them for a long time
simulating longer distances. They will
always return to their point of origin. However, you can design a point-to-point in
which trains run from A to B but must then be able to return. That arrangement requires either a push-pull
operation in which you are backing up in one direction, a wye operation in
which the train turns around, or a double-track at the end in which you can
uncouple the locomotive and do a run-around.
Another possibility for reversal on a point-to-point, especially good
for passenger operation, is to bring in a new locomotive that will couple to
the end of the train and pull it out leaving the first locomotive in the
station. I used to have that operation
at two of my stations in my previous layout, but I lack the space in my current
one. In my last three layouts, which
have been my most extensive, I have had a combination of loop or dog-bone
trackage and point-to-point. That
configuration provides me flexibility and variety in operation.
6. *Another decision you should probably make
would be how you want to power your trains.
The old method was to hook a power pack (called a transformer in the old
Lionel days) to your track. You then
control the train movement by turning a handle that transmits six volts of
electricity to your track. Most people
prefer some kind of remote control.
Aristocraft offers a remote controller that is linked to power
packs. With it you can control several
trains. Most modelers today use a cab
control digital system (DCC) that uses a module installed in each
locomotive. Train operations are then
programmed into your remote control device.
I prefer the Aristocraft system.
When you want to park a locomotive and operate another one, you can put
it on a blocked track that has a plastic rail joiner installed that prevents
the flow of the electricity into that section of track. It can be powered by turning on a switch
linked to that particular block. If you
power from overhead catenaries, such as you would find in Europe or on American
east coast rail lines, you can simply drop the pantograph, and the locomotive
has no power. Some switches (turnouts)
such as Pico will cut power when they are switched to a different track. My last layout had trains operating from the
overhead power, but this one is powered from the track even though I still have
catenary.
That is probably enough cogitation
before you actually do something, because by the time you make all these basic
decisions, you are going to be itching to get on with the program. The next step is to conceptualize the layout
(a wonderful exercise for lying in bed, taking a shower, or driving to and from
work), and it’s great fun. The next step
follows very quickly: you get some paper, pencil, ink, ruler, and eraser and go
to work with drawing a diagram. Don’t
worry if you depart from it because you will make changes and adjustments, but
you need to start somewhere, and you need a basic idea how you want to proceed. Sometimes you can get ideas from other
layouts. “Model Railroader” magazine has some good ones; I found mine there in
a published layout that some modeler shared.
I made some adaptations but went with the basic design. It calls for trains to go from the station up
a ramp to an upper level and then back down to the station, thus making two
loops before returning to its point of origin.
Now that you have your plan, you have
the first tangible element of your layout.
Congratulations! Now you know you
have really begun the construction of your very own railroad. I would suggest at this juncture that you
make a list of the materials you will need and begin to collect them. The more you have in advance, the easier it
will be once you start the actual construction.
At that point it is annoying to realize that you don’t have what you
need and have to order it or make a trip to the hobby shop. If it is your first layout you will need to
think of materials for the bench work (train table or surface), track,
switches, power packs and control devices, locomotives and rolling stock (to
which you can always add), buildings, scenery materials, track nails, rail
joiners, tools, and hook-up wire. Of
course, there is always more, but those things can come later. Please don’t let my list seem to daunting to
you. You don’t need to rush out and buy it all at once; just start collecting
the things you will need. For my current
layout I really didn’t need too much that was new as I salvaged so much from my
previous one. I did buy professional
catenary and operating signal lights, but the locomotives, rolling stock, and
buildings I had from the earlier layout.
Of course, I had to buy all new scenery materials. Let me say right now that doing the scenery
is truly one of the most exciting and satisfying aspects of construction for
me.
Once you have enough materials,
and once you have your bench work in place, then you can start laying the
track. At this point your layout is
taking shape, and you will not only have great fun but realize that it is
really happening! I suggest laying
sheets of half-inch or ¾ inch Homosote on top of your bench work. That will make the work so much easier, and
the trains will run so much quieter.
Then buy some cork roadbed and lay it (nail it down) where you want your
trains to run. The cork roadbed further
insulates the trains so they run even quieter, and it provides a realistic
look. Installing the track on top of the
cork roadbed is great fun. You will buy
3-foot sections and nail at the pre-drilled holes. You will need to cut some of the track to
make a proper fit which requires track-cutting shears. Have a file so you can smooth the cut
area. Join tracks with rail joiners
remembering to install plastic ones on one rail where you want to cut power to
a block.
At this point you can wire the
track and actually begin to run the trains.
It gets more and more enjoyable!
Install your buildings; you can always play with them, repositioning
them until you have them just as you want them.
Then you can start the really artistic work of installing the
scenery. At this point your railroad
will take on the appearance of being the real thing. You need ballast for the track (which needs a
glue mixture to keep it in place. Start
by wicking it with alcohol then dropping on white glue diluted with water. Let it dry overnight). Once track is installed, ballasted and
buildings are in place, you can do whatever your heart desires. You can create streets, forests, install
grass, add people, cars…whatever your layout plans call for. I even added tiny wildflowers. There is no limit beyond your own, as I said,
imagination and creativity!
One example: I had a space shaped
like a half-moon between two sections of curved track. That space is near my main station at Zürich
and at the corner of the layout, about the first thing a visitor would see in
walking into the train room. I wanted
something really beautiful, so I designed a park. I had a piece of “water” made from epoxy from
the previous layout. It had a man
standing waist-deep in the water fishing.
I incorporated the lake, designed walkways, flower gardens, and bought
some really beautiful trees, put in people strolling along the walk and flowers
along the side. I designed a flower bed
shaped like a clock such as is often seen in Switzerland. I added picnic tables, a man working in the
flowers…all kinds of activity. It is
enjoyable just to look at it as it turned out so well. You can do the same kind of designing which
will bring you much enjoyment and satisfaction.
The more attention you give to
detail, the better. You will be glad
later. And do not get in a hurry. So much of the joy is in the building stage,
and you will not regret careful and meticulous construction. Take it from me. My previous layout was assembled hastily so I
could begin running trains and then modified later. Taking the advice of a good friend, I took my
time with this one, and I am much more satisfied with it.
Your hobby shop, “Model
Railroader”, and others who have layouts can all become sources of information.
What I have written here is just to
entice you and encourage you to plan a layout.
“Model Railroader” publishes some very useful DVDs that provide all
kinds of specific, helpful information. Please
feel free to contact me if I can be of any help. Your layout should be what YOU want it to be;
what you will enjoy. It is your world
over which you reign as supreme. Enjoy
the journey. Don’t let the frustrations
of inevitable problems discourage you.
Every problem has its solution!
And the layout doesn’t go anywhere.
You can leave off work on it for a while, and it will be waiting for
you.

Layout room finished, bench work ready

Buildings being positioned, trying to decide where cities would be

Attic space before construction on room started
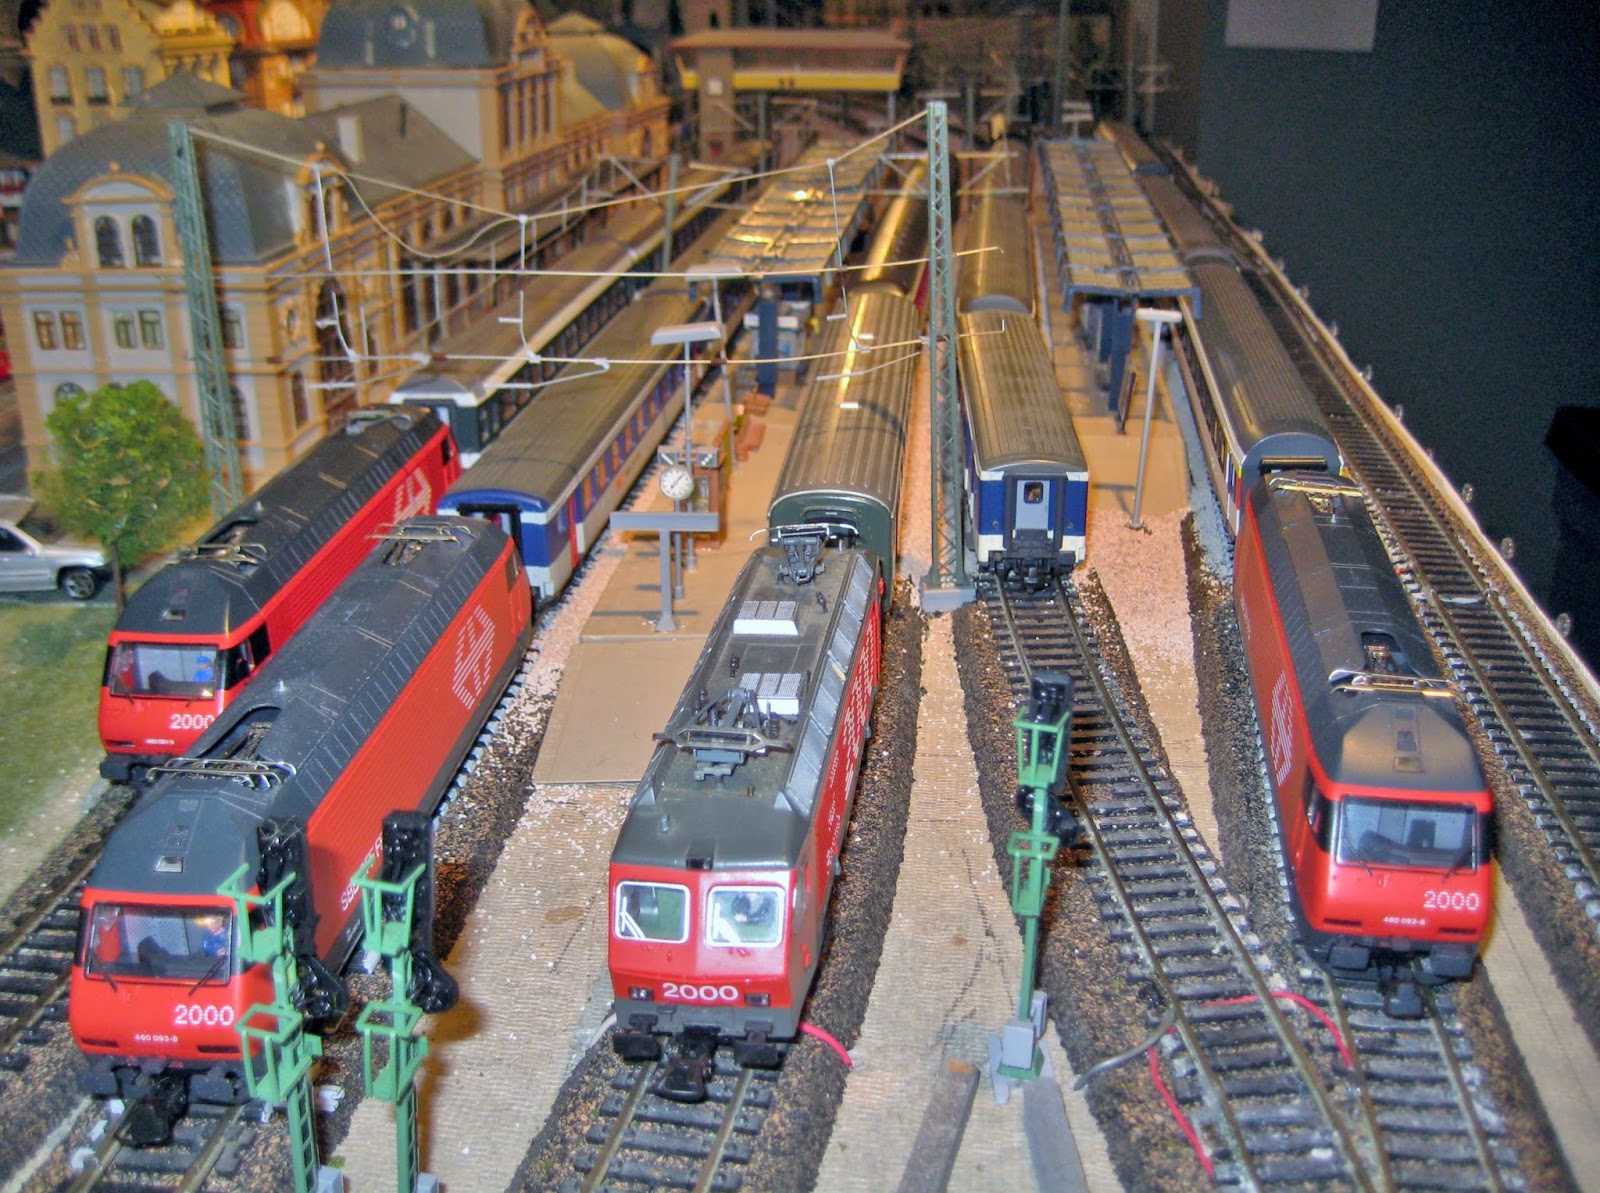
Main Zürich station complete except for ballast and scenery

Catenary is by Viessmann. Zürich station with city buildings, control tower

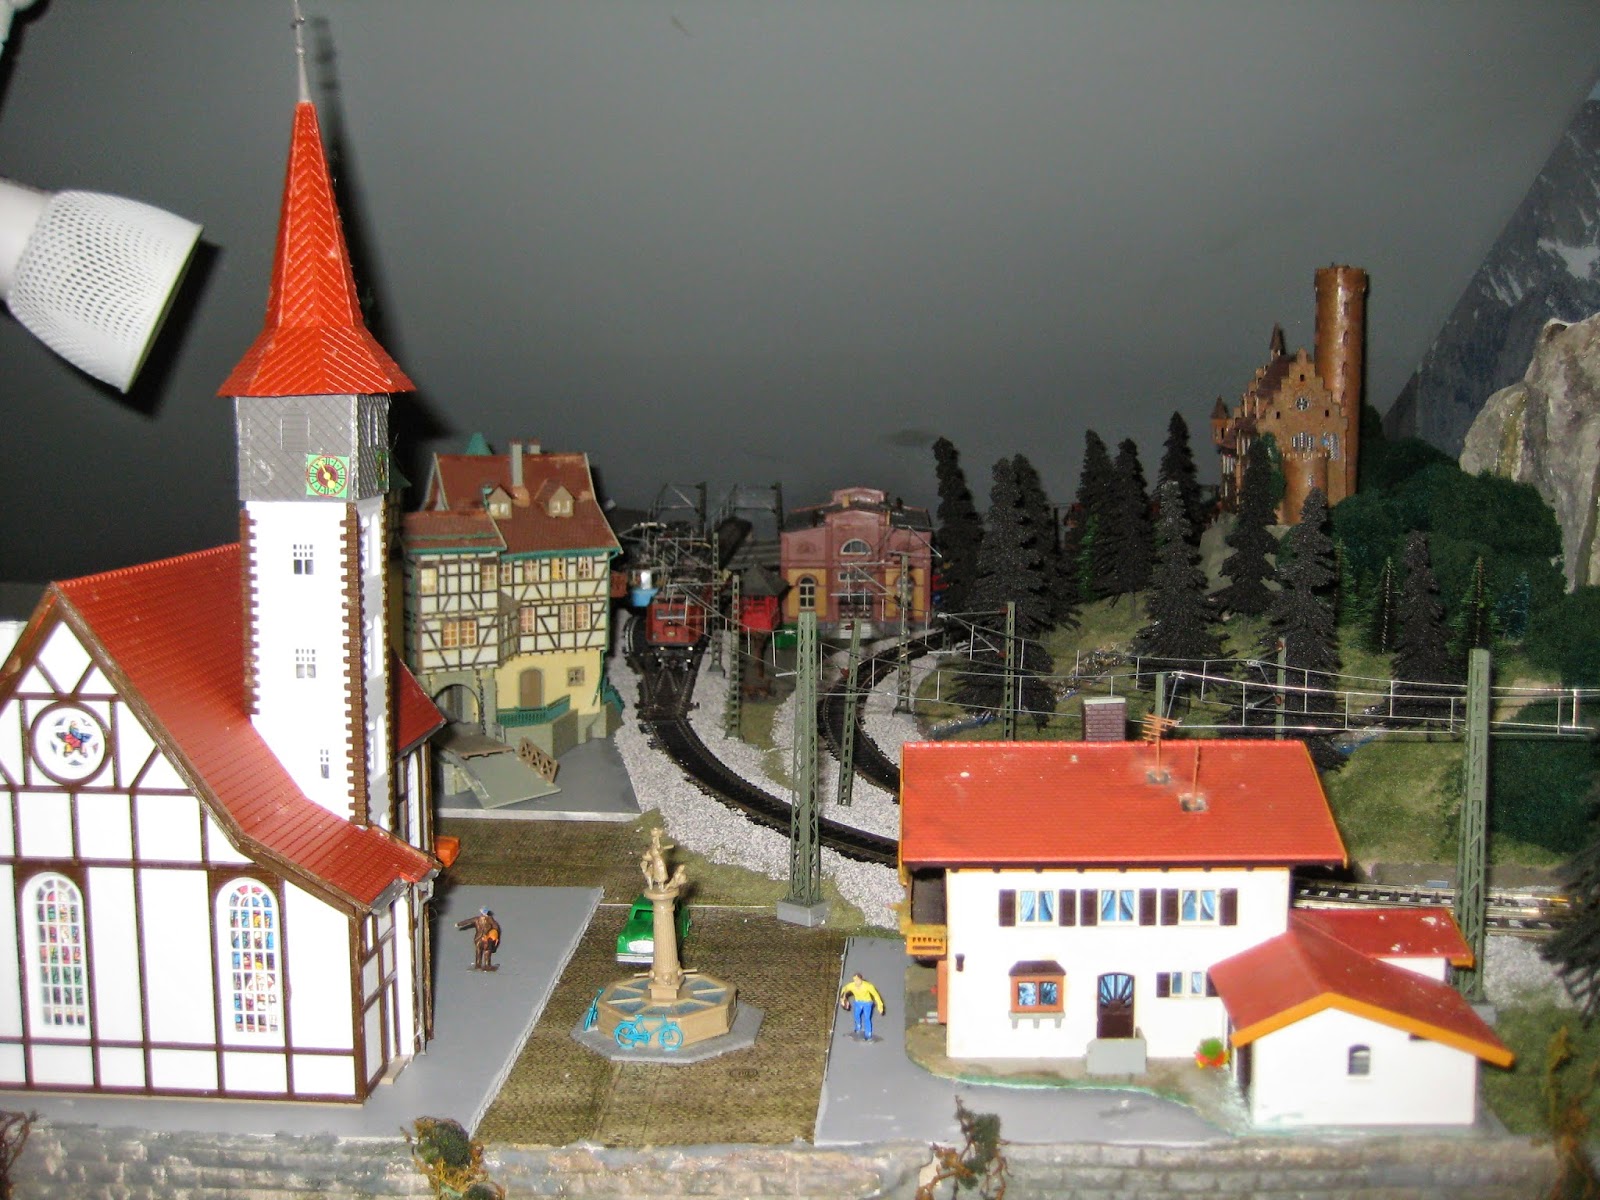
Zürich station. Scenery in. Note street with streetcar tracks, old city gate, cathedral

Trains at platform. Train in foreground goes from Zürich up ramp to Chur on upper level

Streetcars crossing at St. Gallen. Yellow car entering tunnel, red emerging.

Streetcars and main street at St. Gallen

Streetcars on one of two streets in Zürich


Chur

Tracks leaving Zürich. Note old city wall and gate at left.

Three tracks from Bern converging with three tracks from Zug before entering tunnel

Corner view. Mountains of Zermatt with N-scale buildings not yet installed

Train on track 4 at Zürich

Trains at St. Gallen

Zürich station

Chur on upper level

San Moritz on upper level

St. Gallen

Appenzell
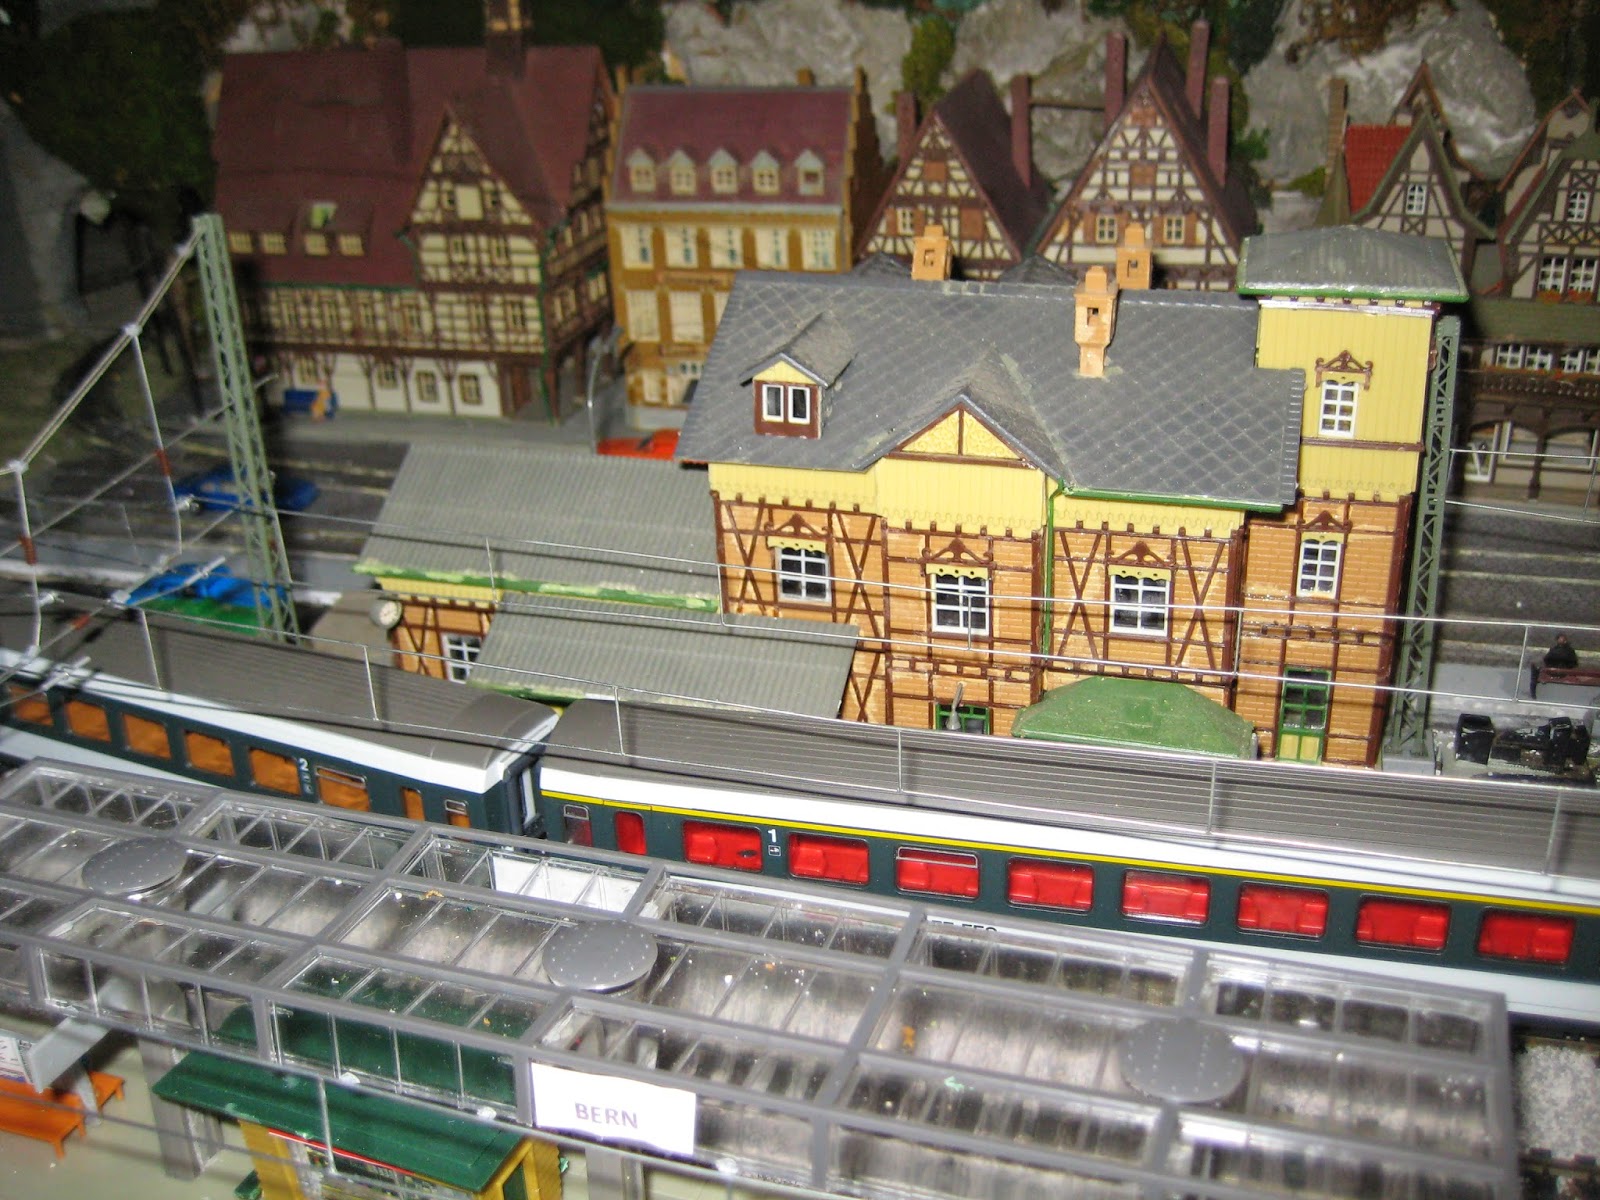
Bern
Zermatt on upper level

Zug
Train on track 2 at Zürich station